Self-hosting Vaultwarden on a ZimaBoard 2 with ZimaOS and Cloudflare Tunnel
A practical setup for running Vaultwarden on ZimaOS with HTTPS through Cloudflare Tunnel, without router port forwarding.
IceWhale sent me the ZimaBoard 2, the HDD rack, and a 4K mini display HDMI adapter free of charge for review. This did not influence the content — my opinions are my own. More articles about this hardware will follow.
Vaultwarden is a lightweight, unofficial Bitwarden-compatible server implementation. It is a good fit for small home servers because it runs well as a container and does not need much CPU or memory.
In this setup, Vaultwarden runs on a ZimaBoard 2 with ZimaOS. HTTPS access is handled through Cloudflare Tunnel, so no router port forwarding is required.
The final result is https://vw.mickhat.xyz. Internally, Vaultwarden still runs on the ZimaBoard over plain HTTP, and Cloudflare Tunnel sits between the public HTTPS hostname and the local service:
Browser / Bitwarden client
        ↓
https://vw.mickhat.xyz
        ↓
Cloudflare Tunnel
        ↓
cloudflared on ZimaOS
        ↓
http://192.168.178.118:10380
        ↓
Vaultwarden container
Why Cloudflare Tunnel?
A direct local HTTP setup looks simple at first. Vaultwarden loads over http://192.168.178.118:10380, but the web vault refuses to work and shows this error:
You are not using a secure context which is required
for the Subtle Crypto API to work. You need to enable HTTPS!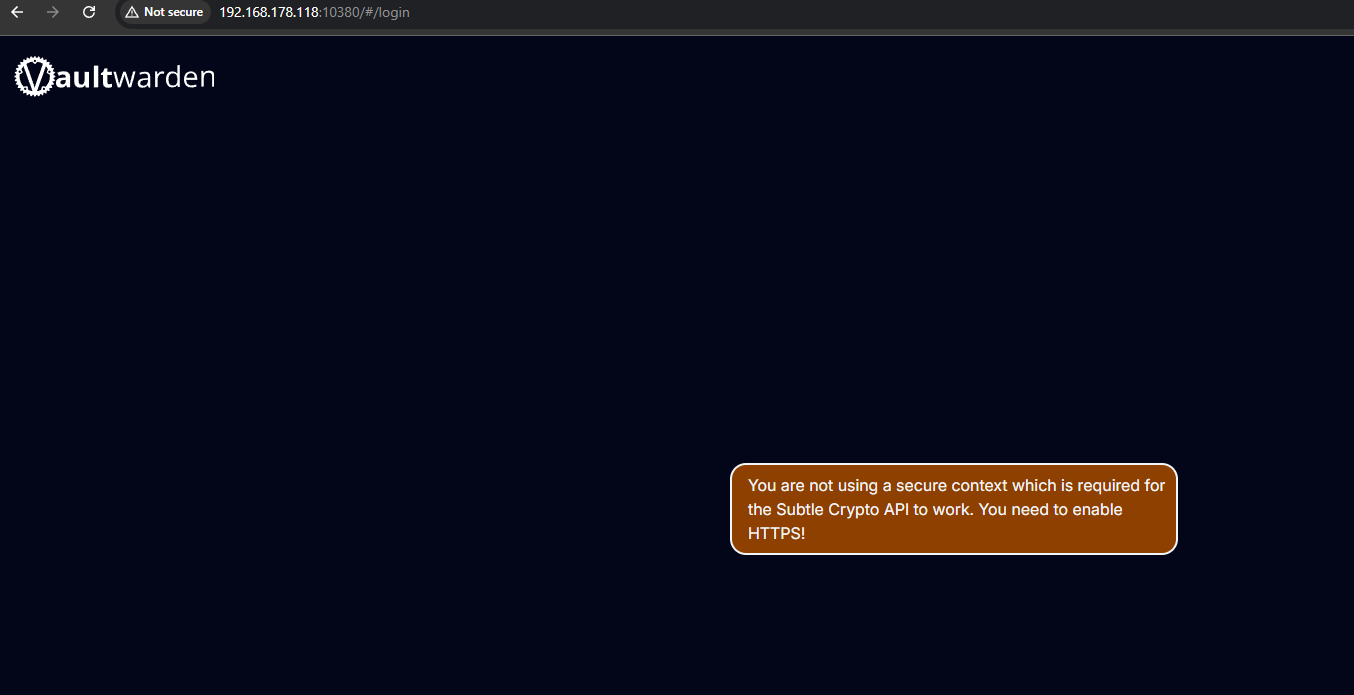
This is expected. The Vaultwarden web vault depends on browser cryptography APIs, and those only run in a secure context. The Vaultwarden project also recommends putting HTTPS in front via a reverse proxy or an equivalent frontend.
For this setup, Cloudflare Tunnel is that frontend. It exposes the local service through a public hostname without opening ports on the router.
Prerequisites
This setup assumes:
- ZimaBoard 2 with ZimaOS installed
- A domain managed through Cloudflare
- Access to the Cloudflare dashboard
- Cloudflared installed from the ZimaOS App Store
- Vaultwarden installed from the ZimaOS App Store
Example values used in this article:
| Item | Value |
|---|---|
| ZimaOS IP | 192.168.178.118 |
| Vaultwarden local port | 10380 |
| Local Vaultwarden URL | http://192.168.178.118:10380 |
| Public hostname | vw.mickhat.xyz |
| Public Vaultwarden URL | https://vw.mickhat.xyz |
Replace these values with your own IP address, port, and domain. The IP addresses shown here are private LAN addresses and not reachable from the internet.
1. Install Cloudflared from the ZimaOS App Store
Open the ZimaOS App Store, search for Cloudflared, and install it. After installation, Cloudflared appears as an app on the ZimaOS dashboard.
The app runs Cloudflared-web, a small web UI reachable on port 14333 of the ZimaOS IP. It has a single field for a Cloudflare Tunnel Connector Token — that token is created in the next step.
In my setup, the app initially showed an older container version and suggested updating the Docker tag to 2026.6.1. If the same message appears, update the app’s Docker tag accordingly in the ZimaOS app settings. Do not treat this version as permanently current — use whatever version your own installation shows at the time.
2. Create a Cloudflare Tunnel
Open the Cloudflare dashboard and go to:
Networking → Tunnels → Create TunnelCreate a new tunnel. In this example, I use the name zimaboard-vaultwarden.
After creating the tunnel, Cloudflare shows setup instructions for different operating systems. Because Cloudflared is already installed through ZimaOS, none of the installation commands are needed — only the tunnel token. The useful line is the manual tunnel command:
cloudflared tunnel run --token <TOKEN>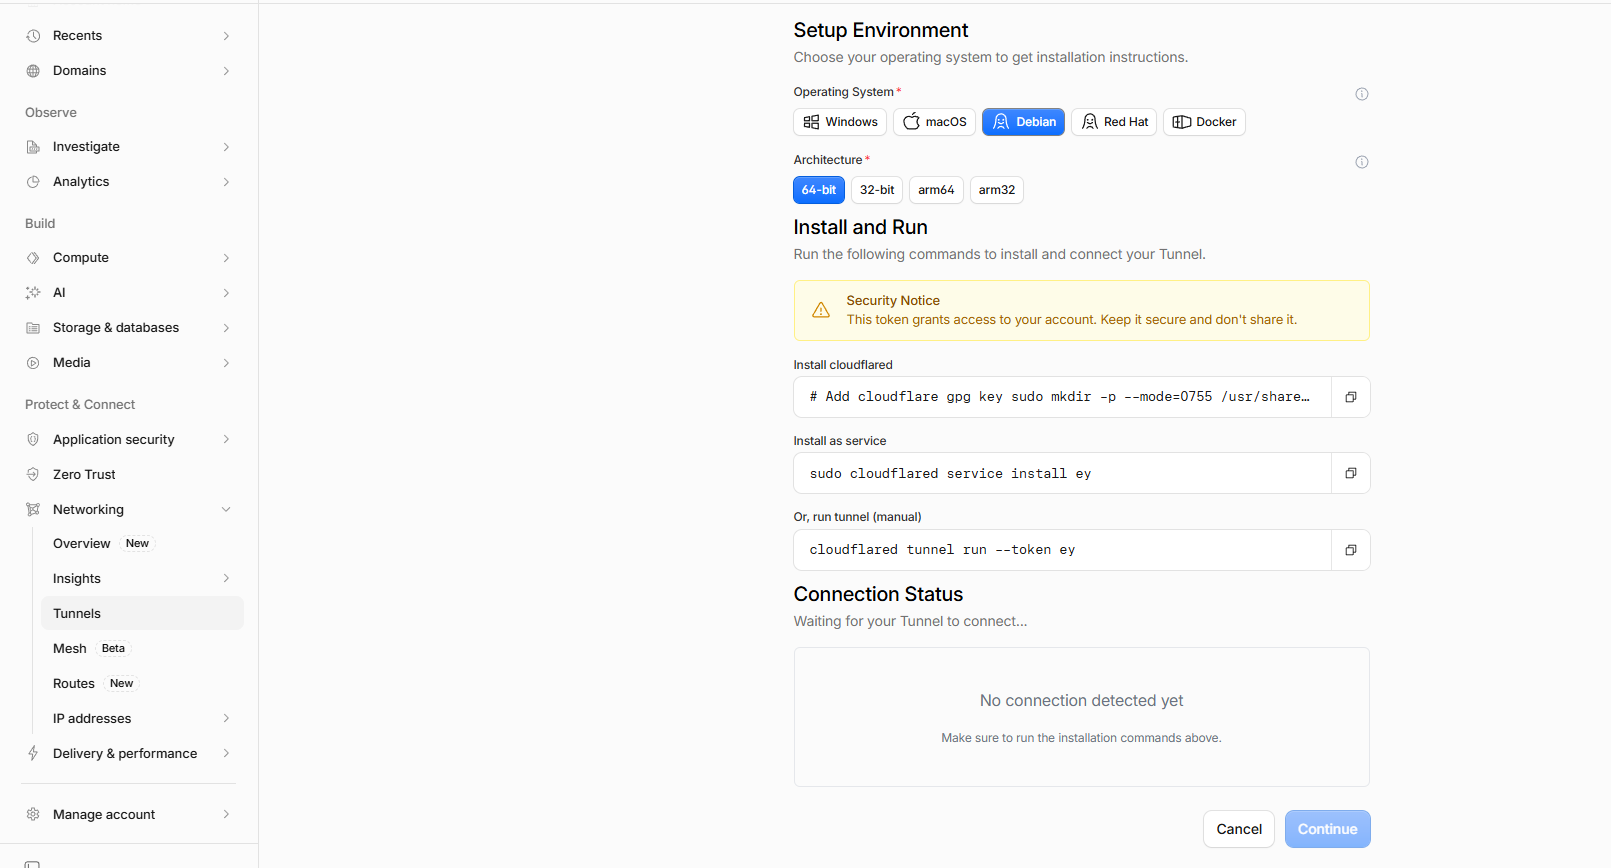
Copy the token after --token.
Never publish this token. If it ever appears in a screenshot or article draft, rotate it or recreate the tunnel.
3. Paste the token into the ZimaOS Cloudflared app
Go back to ZimaOS, open the Cloudflared app, and paste the token into the field labeled Enter Tunnel Connector Token.
Pasting the token alone works, but it is not required: Cloudflared-web also accepts the entire command from the Cloudflare dashboard, such as cloudflared tunnel run --token eyJhIjoi... or cloudflared service install eyJhIjoi..., and extracts the token from it automatically.
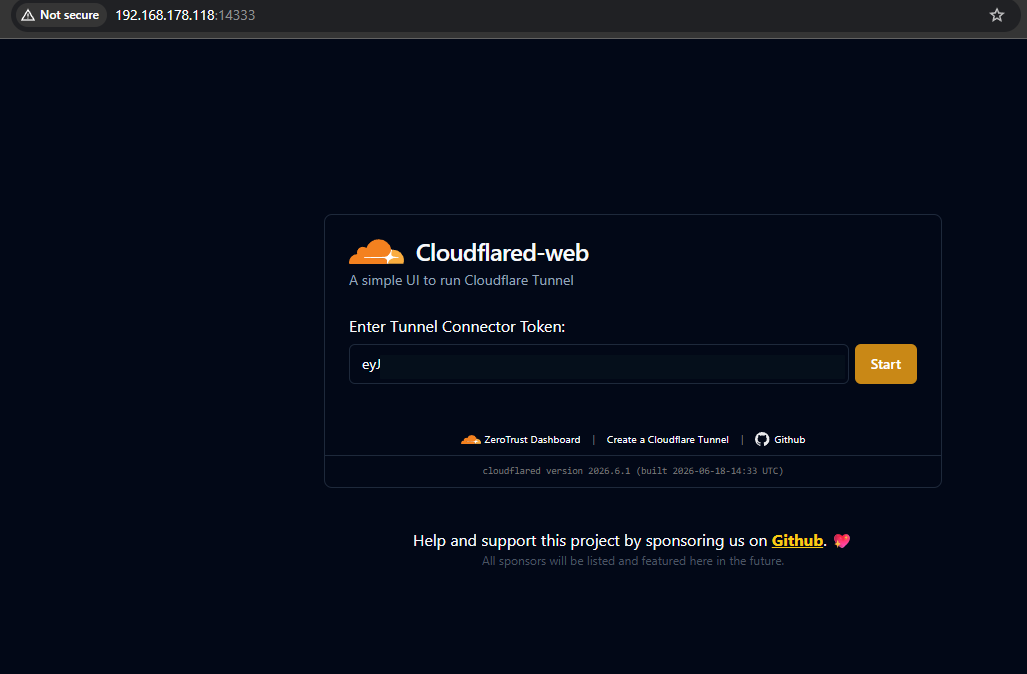
Click Save. Once the token is stored, the button changes to Start, and while the tunnel process is running it shows Stop.
Back in the Cloudflare dashboard, the tunnel should now show a successful connection:
Tunnel connected successfully
Your Tunnel is now ready to use.
At this point, the tunnel is online, but it does not yet route traffic to Vaultwarden. That is configured later with a published application route.
4. Install Vaultwarden from the ZimaOS App Store
Install Vaultwarden from the ZimaOS App Store, then open the app settings and note the local IP and port. In my case, Vaultwarden is available locally at http://192.168.178.118:10380.
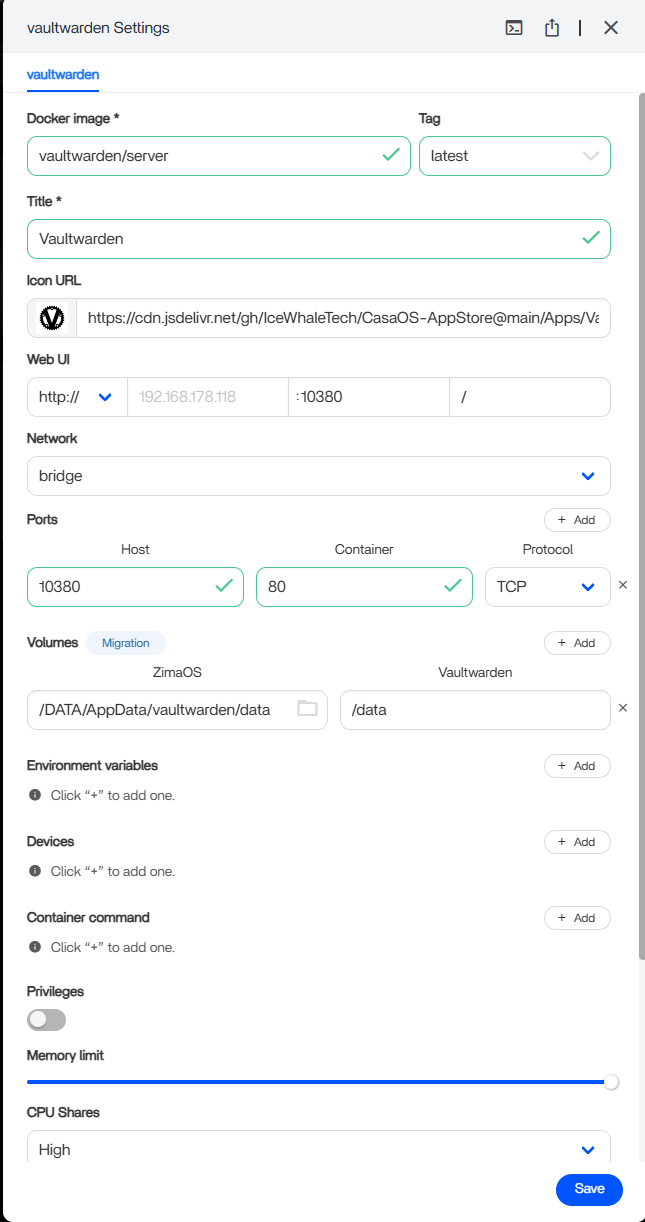
The relevant container settings are:
Docker image: vaultwarden/server
Port mapping: 10380 → 80/TCP
Volume:       /DATA/AppData/vaultwarden/data → /data
The volume is important. It stores the Vaultwarden database and persistent application data.
5. Add a route for Vaultwarden in Cloudflare
Open the tunnel overview in Cloudflare. The tunnel should be healthy, but it may show zero routes. Click Add route and add a published application for Vaultwarden.
For my setup, the values are:
Subdomain:     vw
Domain:        mickhat.xyz
Full hostname: vw.mickhat.xyz
Path:          empty
Service URL:   http://192.168.178.118:10380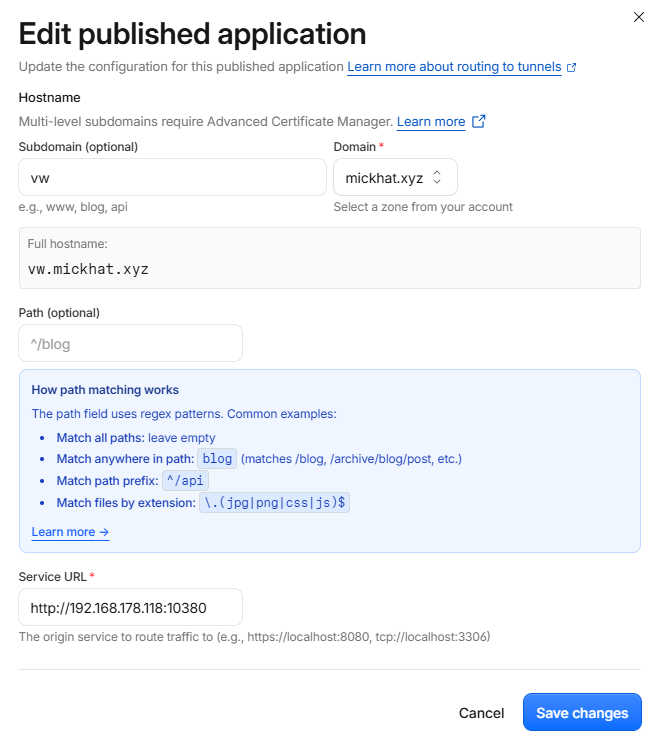
The service URL uses http://, not https://, because Vaultwarden runs locally over HTTP. Cloudflare provides HTTPS on the public hostname.
Click Add route. Cloudflare confirms that the route was added and that a DNS record was created. The generated record is usually a CNAME pointing the public hostname to a Cloudflare tunnel target:
vw.mickhat.xyz → <tunnel-id>.cfargotunnel.comThere is no need to manually point the hostname to your home IP address.
6. Open Vaultwarden through the Cloudflare hostname
Open Vaultwarden through the public HTTPS hostname https://vw.mickhat.xyz — not through the local HTTP URL. The local URL is only the backend address used by Cloudflare Tunnel.
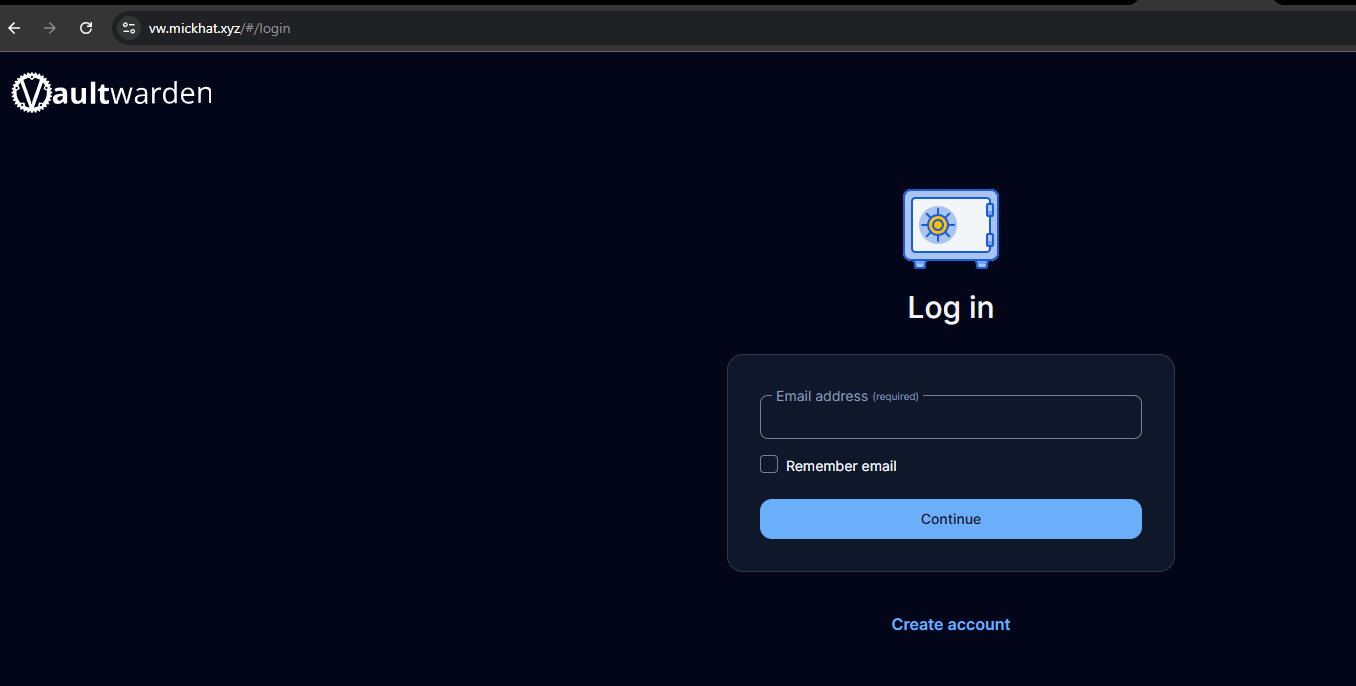
Create the first Vaultwarden account. Registration is open by default on a fresh Vaultwarden install — it gets locked down in the next step through the admin panel.
7. Enable the admin panel and lock down the instance
Vaultwarden ships with an admin panel at /admin, and almost the entire configuration can be done there — no environment variables needed. The one exception is the ADMIN_TOKEN that enables the panel itself, and that token should be an Argon2 hash, not a plaintext password sitting in the container config.
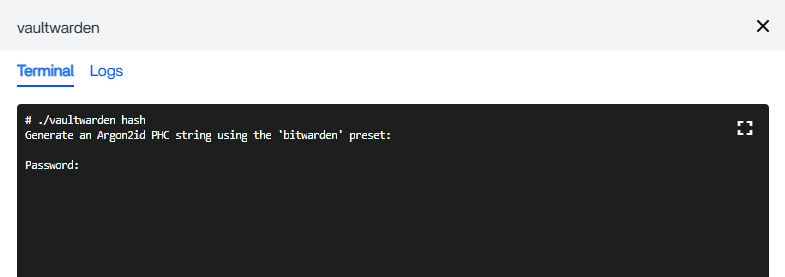
Vaultwarden can generate the hash itself. In ZimaOS, open the Vaultwarden app settings and click the Terminal and Logs icon in the header to get a shell inside the container. Then run:
./vaultwarden hashEnter the desired admin password twice and copy the resulting $argon2id$... PHC string.
Add a new environment variable in the Vaultwarden app settings with ADMIN_TOKEN as the name and the full PHC string as the value, then restart the app. The admin panel is now available at https://vw.mickhat.xyz/admin.
One pitfall for anyone replicating this with docker-compose instead of ZimaOS: the hash is full of $ characters, which compose interprets as variables. Every $ must be doubled ($$argon2id$$...) there. In the ZimaOS settings UI, the value can be pasted as-is.
Log in to the admin panel with the admin password and configure the instance under General settings:
- Set the domain to
https://vw.mickhat.xyz. It must match the public hostname, otherwise features like attachments and icons misbehave. - Disable Allow new signups — the first account already exists.
- Disable invitations and password hints.
Settings changed in the admin panel are stored in /data/config.json and take precedence over environment variables.
8. Connect Bitwarden clients
Vaultwarden is compatible with Bitwarden clients. In the Bitwarden desktop app, mobile app, or browser extension, choose the self-hosted server option, enter https://vw.mickhat.xyz, and log in with the Vaultwarden account created earlier.
Backup path
The important Vaultwarden data path in this setup is /DATA/AppData/vaultwarden/data. Back up the complete Vaultwarden app directory, not only a single file:
/DATA/AppData/vaultwarden/Important data includes:
db.sqlite3
attachments/
sends/
rsa_key*
A password manager without a tested backup is a bad setup. Store backups on a second device or encrypted remote storage.
Security notes
The admin panel settings from step 7 (signups, invitations, and password hints disabled) are the minimum. Beyond that:
- Leave router ports closed — the tunnel is the only entry point this setup needs.
- Keep the Cloudflare tunnel token private, and rotate it if it ever leaks.
- Redact tokens, IDs, and origin details in any screenshots you share.
- Use a strong master password and enable two-factor authentication on the Vaultwarden account.
- Keep Cloudflared and Vaultwarden updated.
- Keep offline or external backups of the Vaultwarden data directory.
I would not put Cloudflare Access in front of Vaultwarden by default. The web interface may work, but Bitwarden browser extensions and mobile apps can have problems when an additional login page is placed in front of the Vaultwarden API.
Troubleshooting
Vaultwarden still shows the secure context error
You are probably opening the local HTTP URL (http://192.168.178.118:10380). Use the Cloudflare HTTPS hostname instead: https://vw.mickhat.xyz.
Cloudflare Tunnel is connected, but Vaultwarden does not load
Check the route configuration — the service URL must be the local HTTP address, in my case http://192.168.178.118:10380. Then check whether Vaultwarden is reachable locally from the ZimaOS network.
Cloudflare route exists, but the hostname does not resolve
Check that Cloudflare created the DNS record. The hostname should point to a Cloudflare tunnel target similar to <tunnel-id>.cfargotunnel.com.
Registration is still open
Disable Allow new signups in the admin panel under General settings, then save. No restart is required for admin panel changes.
Conclusion
Vaultwarden runs well on a ZimaBoard 2 with ZimaOS. The main hurdle is HTTPS: the web vault simply refuses to run over plain HTTP, so direct LAN access is not a usable final setup.
Cloudflare Tunnel solves this cleanly. There is no router port forwarding, HTTPS comes through a real hostname, Vaultwarden itself stays local on ZimaOS, and the whole thing works with the regular Bitwarden clients.
The pieces that matter: the Cloudflared app with the tunnel token, a published application route pointing at the local Vaultwarden URL, the domain set to the HTTPS hostname in the admin panel, open registration disabled after the first account — and regular, tested backups.